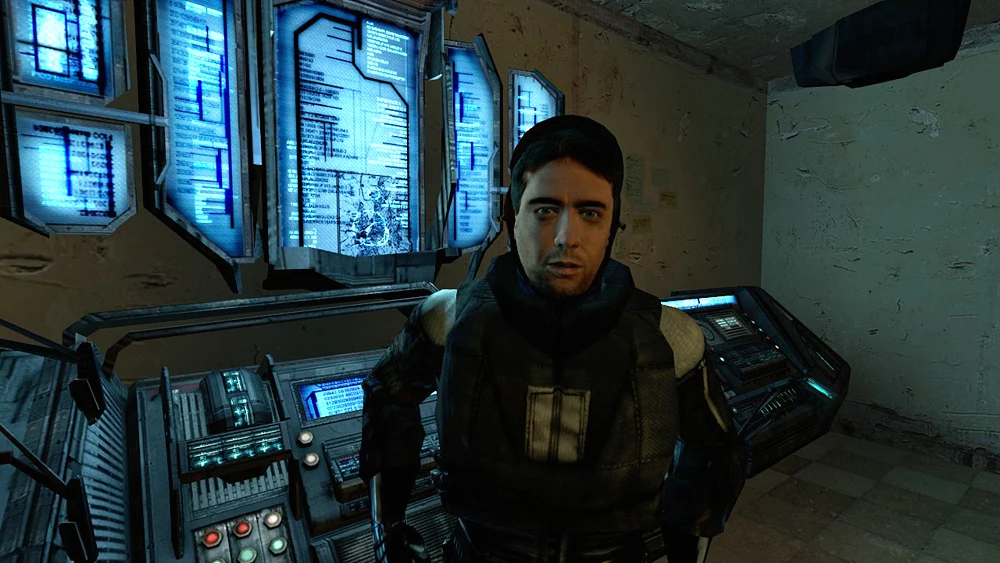
Last time I left you unconscious, surrounded by Combine soldiers beating benevolence into you. Forcibly. This time we'll start up again just after Alyx Vance introduces herself. You both walk through some back passageways, and eventually to a secret tunnel and into the laboratory of your old Black Mesa coworker, Dr Kleiner.
Dr Exposition's Lab
This is where the first pseudo-cutscene happens. The game restricts your movement to the one room, and you simply listen as the other three characters exposite at you for a few minutes. They explain that you've really stirred up the Combine and that they need to get you somewhere safe as soon as possible. Kleiner gives you your old suit of armor and brings you and Alyx into the teleporter room.
This whole scene exists to show you that the resistance is barely scraping by. The lab is full of equipment clearly stolen from the Combine or crafted from foraged parts. There are only three people here, showing that the numbers of resistance fighters are very low, and overall you get a strong sense that these people are just clinging on for dear life. The teleporter highlights that quite well. Alyx goes first, repeatedly asking if the contraption is safe, and being assured that there will be no repeats of what happened to "the cat". The machine works, but only after some hiccups to reinforce the precarious nature of it and to foreshadow what's about to happen. When it's Gordon's turn, the machine breaks down and you're teleported to several other places. A random beach, your actual destination, an underground lake filled with monsters, and most importantly, Dr Breen's office. At first Breen freaks out asking what you're doing there, but the moment you disappear he calls his boss. When you reappear you see him discussing your presence, confirming that Freeman is indeed alive. Apparently the Combine are so afraid of Freeman's presence that it's worth an immediate call to the overlord of this whole ordeal the moment Freeman appears again. Right after this, you appear outside of Kleiner's lab and go on about your day with Barney yelling behind you that the whole city is now on alert.
This whole scene exists to show you that the resistance is barely scraping by. The lab is full of equipment clearly stolen from the Combine or crafted from foraged parts. There are only three people here, showing that the numbers of resistance fighters are very low, and overall you get a strong sense that these people are just clinging on for dear life. The teleporter highlights that quite well. Alyx goes first, repeatedly asking if the contraption is safe, and being assured that there will be no repeats of what happened to "the cat". The machine works, but only after some hiccups to reinforce the precarious nature of it and to foreshadow what's about to happen. When it's Gordon's turn, the machine breaks down and you're teleported to several other places. A random beach, your actual destination, an underground lake filled with monsters, and most importantly, Dr Breen's office. At first Breen freaks out asking what you're doing there, but the moment you disappear he calls his boss. When you reappear you see him discussing your presence, confirming that Freeman is indeed alive. Apparently the Combine are so afraid of Freeman's presence that it's worth an immediate call to the overlord of this whole ordeal the moment Freeman appears again. Right after this, you appear outside of Kleiner's lab and go on about your day with Barney yelling behind you that the whole city is now on alert.
- Route Kanal -

Ready for a swim?
Now you have your first weapon and the game really begins. You are very quickly presented with two Combine soldiers attacking citizens, and are forced to kill the soldiers. Shortly after you get your first sight of the resistance symbol painted on the walls, and a stash of useful items to restore and rearm you. The idea here seems to be one of cooperation, as you help the citizens, the resistance will help you. The environment is also starting to show you the state of the resistance, as the first logo you see from them is in a run-down, abandoned building. Shortly after seeing that you walk through a Combine outpost overlooking a train, and very clearly in much better shape than the resistance building just before it. Combine show up here and force you into the sewers to escape them, and in those sewers you find your first resistance hideout.

Not the nicest of accommodations
Here you learn several things. First, the resistance human gives you directions for where you need to go next and mentions an underground railroad. Then, the vortigaunt heals you, showing that despite their hostility in Half Life 1, they are very much on your side now. But the most important narrative element here is that the vortigaunt calls you "The Free Man", with the sound of prophecy in his voice, as if your arrival had long since been foretold.
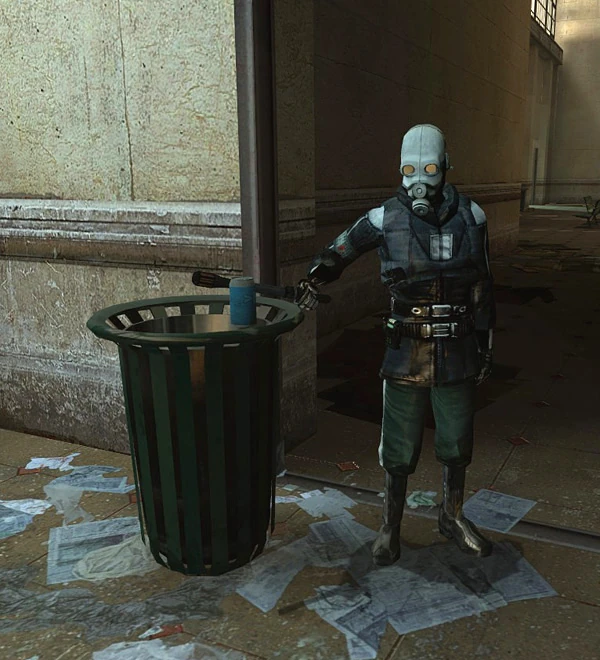
The resistance sends you on your way and the first thing you hear outside of their little train cart home is a Combine announcer's voice saying "Individual, you are charged with social endangerment level one" and ordering the Combine to find you and detain you for interrogation. The whole of Route Kanal seems to be about hiding under the Combine's nose. Particularly from here on out, you spend the rest of this part of the game going through sewer tunnels, drain pipes, etc. all for the sake of circumventing Combine control. Several times you literally walk under soldiers as they discuss their orders to kill you.
They start to take these orders more and more seriously in this chapter as well, with the game introducing vehicles for the first time. A tank fires missiles at you while you're manning a turret, and shortly after you are presented with a helicopter chase sequence. During all this you begin hearing radio transmissions from the underground railroad announcing your arrival, but also warning of the dangerous Man Hacks that have been released into the sewers by the Combine. Clearly they will stop at nothing to take you in, but while the Man Hacks are a brutal method of finding Freeman, the true depravity of the Combine rears its ugly head a few scenes later.
They start to take these orders more and more seriously in this chapter as well, with the game introducing vehicles for the first time. A tank fires missiles at you while you're manning a turret, and shortly after you are presented with a helicopter chase sequence. During all this you begin hearing radio transmissions from the underground railroad announcing your arrival, but also warning of the dangerous Man Hacks that have been released into the sewers by the Combine. Clearly they will stop at nothing to take you in, but while the Man Hacks are a brutal method of finding Freeman, the true depravity of the Combine rears its ugly head a few scenes later.

At what point does THIS become acceptable?
You walk through the sewer tunnels, eventually coming upon a place with yellow water. Your suit's geiger counter begins clicking, warning you of radioactivity. Sadly, there's a member of the underground railroad even here, showing that they will literally live anywhere they can to get away from the Combine. And you can't really blame them considering that moments later you see two citizens run away from an open area screaming "They're shelling us!". The explosion of the shell takes out these citizens, but the horror mounts even higher when live head crabs crawl out of the wreckage and dig themselves a home in the surrounding sludge. But the biggest horror comes when you round a corner and look into the face of a citizen who's head has been replaced by a head crab. The citizen growls incoherently and lurches into motion, trying to eat you. Several more such zombies lie in wait nearby as well, showing that this is clearly a frequent occurrence.
This area shows the full extent of the depravity of the Combine. They will literally stop at nothing to maintain their control, using bioweapons to turn anyone who does not willingly accept their rule into mindless slaves, incapable of resisting.
And with that, the sequence ends. Next up is Water Hazard!